How to Document Your Homelab Network from Scratch
Your homelab deserves better than memory and sticky notes. Here's how to build documentation that actually works, even if you're starting with nothing.
Most homelab owners know they should document their network. They’ve seen the diagrams, heard the horror stories about forgotten IP addresses, and experienced the frustration of not remembering which port connects to what. But when it comes time to actually start documenting, they freeze. Where do you begin? What do you track? How do you organize it?
The answer is simpler than you think. You don’t need a perfect system on day one. You need a working system that you can build on. Here’s how to create network documentation for your homelab, even if you’re starting from zero.
Start with What You Actually Have
Before you worry about naming conventions, diagrams, or tools, take inventory of your physical hardware. Walk around your homelab and write down every device you see. Every router, switch, access point, server, NAS, firewall, IoT device, and anything else that connects to your network.
Don’t overthink this. Just list them. A piece of paper works. A text file works. The goal right now is to create a complete list of everything that exists. You can organize it later.
Most people are surprised by how many devices they actually have. What started as a router and a laptop has grown into a rack with a dozen devices, a handful of IoT gadgets, and a few wireless access points scattered around the house. You can’t document what you don’t know exists.
Map Your Physical Connections
Once you know what devices you have, document how they connect to each other. This is the most tedious part, but it’s also the most valuable. Every cable in your homelab tells a story. That cable running from your router to your switch carries all your internet traffic. That cable from your switch to your server carries your self hosted applications. That cable from your patch panel to your access point carries your wireless connections.
Trace each cable from one end to the other. Write down which device it connects from and which device it connects to. Include the port numbers on both ends. When you’re standing in front of a tangle of cables three months from now trying to figure out which one to unplug, you’ll be glad you did this.
If your cables aren’t labeled, label them now. A label maker is a small investment that pays for itself during your first troubleshooting session. Use a consistent format. Something like Server 1, Port 3 to Switch 1, Port 12 works fine. The format doesn’t matter as much as the consistency.
Document Your Network Layout
Your network has layers. There’s your internet connection coming in from your ISP. There’s your router handling that connection. There are your switches distributing traffic. There are your VLANs separating different types of traffic. And there are your devices sitting on those VLANs.
Document each layer separately. Start with your internet connection. What ISP do you use? What’s your connection speed? What’s your public IP or how do you get one? What’s your modem’s model and firmware version?
Next, document your router. What’s its IP address? What firmware is it running? What rules does it enforce? How is it configured? Don’t worry about being too technical here. Write enough that you could replace the router tomorrow and have all the information you need to set up the new one.
Then your switches. How many do you have? What are their IP addresses? Which ports connect to which devices? What VLANs are configured and how are the ports assigned? This is where your cable documentation becomes incredibly useful. You can see exactly which ports are in use, which are available, and which ones carry specific traffic.
Finally, your VLANs. What VLANs exist? What purpose does each serve? What subnet is assigned to each? What devices sit on each VLAN? This is the part most homelabs skip, and it’s the part that causes the most confusion when something goes wrong.
Track Your IP Addresses
IP address management is the backbone of network documentation. Without it, you’re guessing. With it, you’re planning.
Start with your DHCP ranges. Which subnets have DHCP enabled? What’s the range of addresses that DHCP hands out? What reservations do you have? Reservations are important because they’re the bridge between dynamic and static addressing. Your server might get its IP from DHCP, but it always gets the same one because of a reservation.
Then your static assignments. Which devices have manually configured IP addresses? What are those addresses? Why are they static? Some devices need static IPs because other services depend on them. Your DNS server, your monitoring system, your web server. If their IP changes, things break.
Document the relationship between IP addresses and DNS names. What hostname resolves to what IP? This is where homelabs often fall apart. You set up a service, give it a hostname, and forget to record the IP. Three months later, you can’t remember if the dashboard is on 192.168.1.100 or 192.168.1.101.
Record Your Services and Applications
Your homelab probably runs more services than you realize. A DNS server. A media server. A home automation platform. A monitoring dashboard. A file share. A backup system. Each of these services runs on a device, uses an IP address, and often depends on other services.
Document each service individually. What does it do? What device does it run on? What IP address and port does it listen on? What other services does it depend on? What credentials are required to access it? Where is its configuration stored?
This documentation serves two purposes. First, it helps you remember how everything fits together. Second, it makes disaster recovery possible. If your server dies and you need to rebuild from scratch, you’ll need to know not just what services you ran, but how they were configured and what they depended on.
Don’t forget to document your credentials. Not the passwords themselves, but where they’re stored. A password manager entry, a vault, a secure note. The location matters more than the password, because the password can be reset but the location can’t be guessed.
Create a Simple Diagram
You don’t need Visio or a design degree. A simple diagram of your network makes everything else easier to understand. It shows the relationships between devices, the flow of traffic, and the structure of your network at a glance.
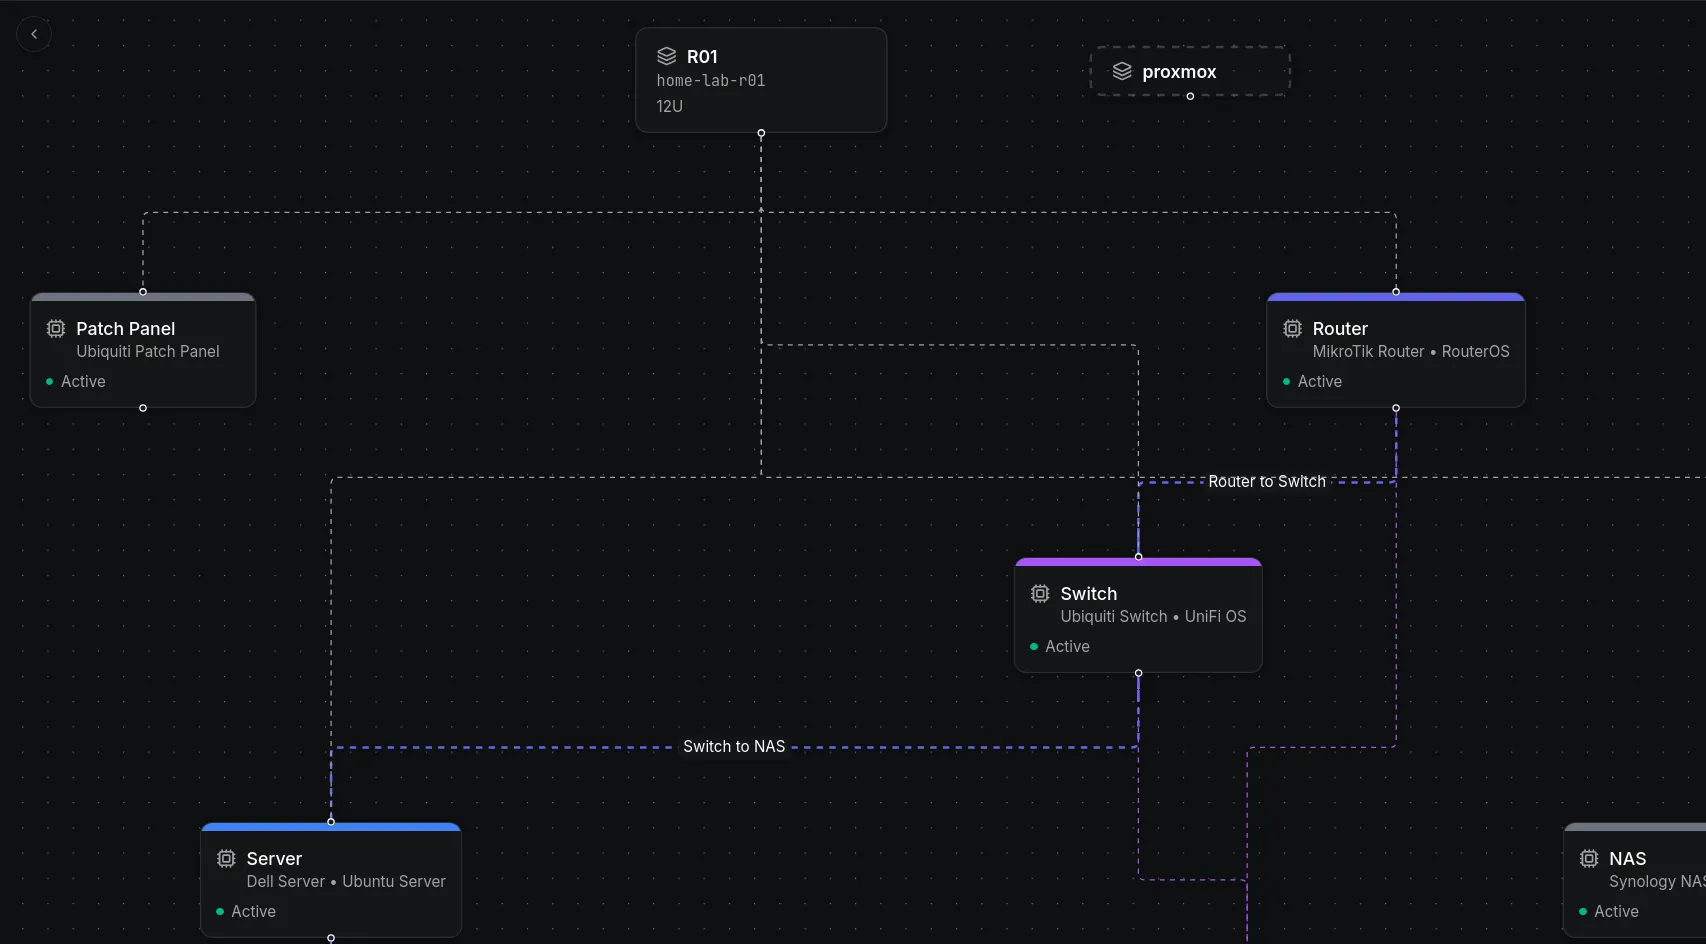
Start with a basic topology diagram. Your internet connection on the left, your router next, your switches distributing to devices on the right. Add your VLANs as color coded zones. Show which devices sit in which zones.
Then create a rack diagram if you have equipment in a rack. Show which devices are where, which U positions they occupy, and how they’re physically arranged. This helps when you need to physically access a device or plan an expansion.
Keep your diagrams in a format you can update. A drawing tool that saves editable files is better than a static image. When you add a device, change a connection, or reorganize your rack, you want to update the diagram without starting from scratch.
Choose Your Documentation Tool
You can document your homelab in a spreadsheet. Rows for devices, columns for attributes, separate tabs for different network segments. It works. You can document it in a markdown file too. Headers for each device, code blocks for configurations, tables for IP assignments. That works as well.
But both of those approaches fall apart the moment your homelab grows beyond a handful of devices. A spreadsheet can’t show you that your server connects to your switch, which connects to your router, which connects to your modem. A markdown file can’t generate a rack elevation from your data. Neither one can tell you which devices share a subnet without manual cross referencing. And neither one tracks what changed, when it changed, or who changed it.
You can do much better. Obelinf is a network and infrastructure management platform built specifically for this kind of documentation. Instead of flat rows in a spreadsheet or static text in a markdown file, you get a connected data model where everything relates to everything else.
Your devices sit in racks. Your racks sit in sites. Your devices have interfaces. Your interfaces connect via cables. Your IP addresses belong to subnets. Your subnets sit within VLANs. Everything is linked, and navigating those connections is effortless. Search works across every entity and every attribute. Find a device by hostname, locate an IP by subnet, or pull up all services running on a specific server. Results are connected, not isolated, so you see the full context of what you’re looking for.
Every change is tracked automatically. When you add a device, move a cable, or reconfigure a service, the system records who did it, when they did it, and what changed. No manual effort required. Your documentation stays current because the system does the work for you.
Obelinf supports rack elevation visualizations, network topology diagrams, multi site deployments, and role based access control. It scales from a single router and switch to hundreds of devices across multiple locations. It’s designed for homelabs that are growing into something bigger.
If you’re ready to stop relying on memory and sticky notes and start documenting your homelab properly, give Obelinf a try. It’s free for your homelab and ready for your business at obelinf.com.