How to Manage IP Addresses in a Homelab
A practical tutorial for planning subnets, assigning addresses, and documenting a homelab IP plan in Obelinf.
On this page
- Decide what your address plan needs to represent
- Create your subnets in Obelinf
- Decide which addresses need to be predictable
- Add addresses and reservations in Obelinf
- Link the address to the right device
- Verify the plan against the live network
- Keep your homelab IPAM current
- The practical homelab workflow
Most homelabs begin with one router, one subnet, and a short list of addresses that you can remember. That works until you add a server, a NAS, a few virtual machines, an access point, and a collection of IoT devices. At that point, finding the address of one service becomes a scavenger hunt through router leases, terminal history, and old notes.
Managing IP addresses in a homelab does not require enterprise complexity. You need a consistent address plan, a clear distinction between assigned and reserved addresses, and a record that connects each address to the device or service using it. This tutorial shows how to build that system in Obelinf without changing the network you already have, completely free on the Personal plan.
Decide what your address plan needs to represent
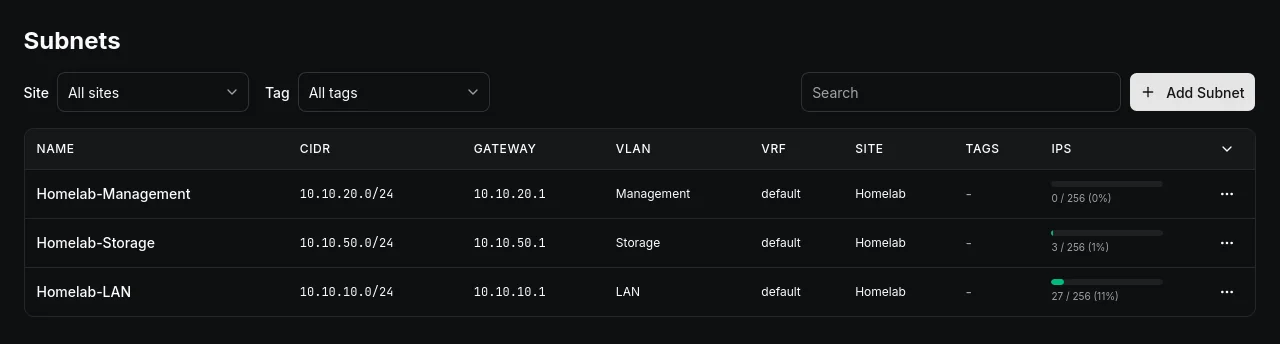
Start by writing down the networks you already have. Check the router, firewall, switch, access points, servers, and virtualization hosts. Record the subnet, gateway, DHCP range, and purpose for each network. If your current network is flat, that is fine. Document the flat network first instead of redesigning it during the inventory process.
A simple plan for a growing homelab might look like this:
| Segment | CIDR | Gateway | Purpose |
|---|---|---|---|
| Management | 10.20.10.0/24 | 10.20.10.1 | Routers, switches, access points, and management interfaces |
| Trusted devices | 10.20.20.0/24 | 10.20.20.1 | Personal computers and trusted clients |
| Servers | 10.20.30.0/24 | 10.20.30.1 | NAS, hypervisors, containers, and internal services |
| IoT | 10.20.40.0/24 | 10.20.40.1 | Cameras, televisions, speakers, and smart home devices |
| Guest | 10.20.50.0/24 | 10.20.50.1 | Temporary devices with internet access only |
The exact numbers do not matter as much as the meaning behind them. A consistent pattern makes an address recognizable before you look it up. If VLAN 30 always maps to the server segment, using 10.20.30.0/24 for that segment gives you a useful memory aid.
For a new plan, use the Subnet Calculator to confirm network addresses, usable ranges, and host counts before you enter them. For an existing plan, record what is actually deployed first and clean up the design later.
Create your subnets in Obelinf
Once you know the networks you need to document, open Subnets in Obelinf and choose New Subnet. Create the broad address block first when you want a parent record, then add the smaller networks inside it. Keep every CIDR block non overlapping so the hierarchy remains unambiguous.
For each subnet, fill in the fields that explain how the network is used:
Name: Use a readable name such as “Servers” or “IoT Devices” instead of only the CIDR.CIDR: Enter the network address and prefix, such as10.20.30.0/24.Site: Select the homelab site if you have created one.VLAN: Link the subnet to its VLAN when the network is segmented.Gateway: Record the router or firewall address for the subnet.Description: Note the DHCP range, firewall intent, or any special constraint.
The IP Address Management feature shows utilization as you add addresses, so the subnet becomes more useful than a static note. It tells you which ranges have room and which ones need attention before a new service is deployed.
Decide which addresses need to be predictable
Not every device needs a permanent address. Laptops, phones, and temporary test machines usually work well with ordinary DHCP leases. Infrastructure and services are different because other systems need to find them reliably.
In a typical homelab, make these addresses predictable:
- Router, firewall, and switch management interfaces
- DNS, reverse proxy, and monitoring services
- NAS devices and backup targets
- Hypervisors and important virtual machines
- Home automation hubs and access points
DHCP reservations are often the best default. The router still controls the assignment, but the device receives the same address every time. Obelinf does not operate your DHCP server, so keep the reservation configured on the router or firewall and document the decision in the IP address record.
Add addresses and reservations in Obelinf
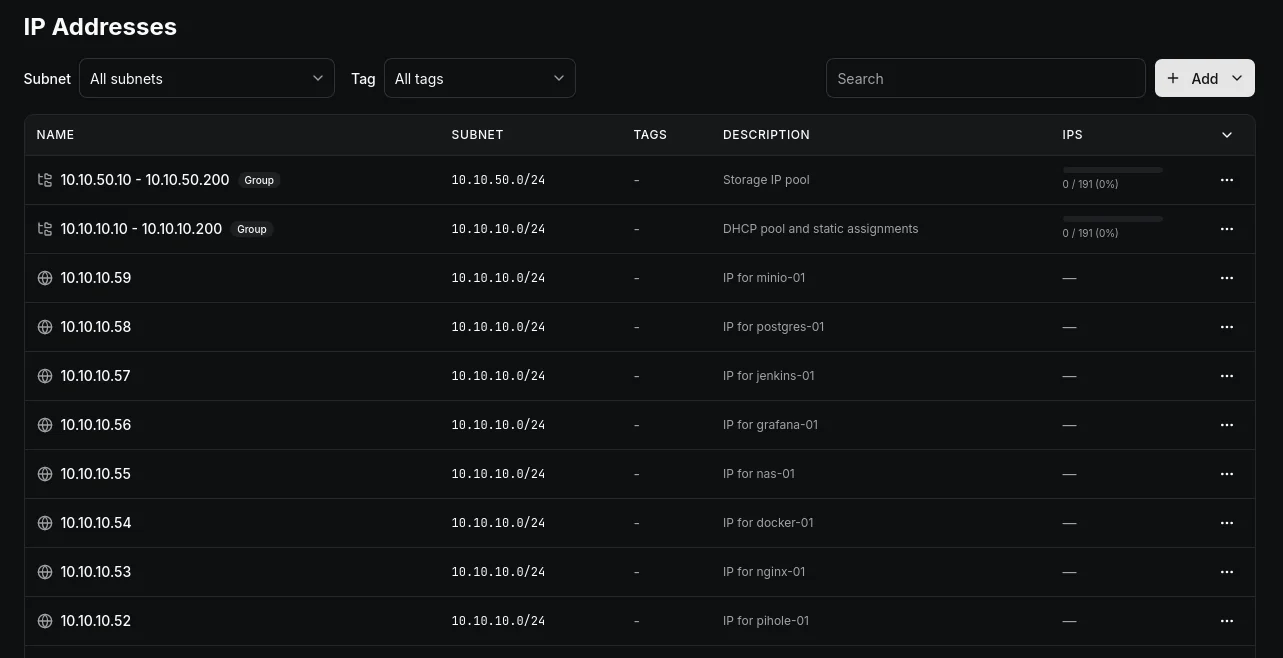
Open IP Addresses, choose Add, and select New IP Address. Choose the subnet first, then enter the address. Obelinf checks that the address belongs to the selected subnet, which catches a common mistake before it becomes a confusing connectivity problem.
Use the remaining fields to make the record actionable:
- Enter the full
Hostname, such asnas-01.home.example. - Choose the
DeviceorVirtual Machinethat uses the address. - Add an
IP Groupwhen the address belongs to a service or deployment range. - Use
Descriptionfor details such as “DHCP reservation on router” or “static address in host configuration”. - Enable
Reserved (not available for assignment)for gateways, future allocations, and addresses that must not be handed to another device.
Do not mark every static address as reserved. In Obelinf, reserved means the address is unavailable for assignment. An address that is already assigned to a device should describe that assignment directly, while a spare address held for a future server should be marked reserved.
Link the address to the right device
An IP address is much easier to use when it answers three questions immediately: what is the address, what uses it, and why does it exist. Create the device record first when the hardware is not already in Obelinf, then select it while adding the address. For a virtual machine, choose the VM instead.
Use names that match the rest of your homelab. If the host is called pve-01 in your hypervisor, router, and backup system, use the same name in Obelinf. Consistent names make global search useful and prevent a record from becoming a second naming system that nobody trusts.
Tags can add another layer of organization. Useful examples include management, server, storage, iot, static, and dhcp-reservation. Keep the tag vocabulary small enough that you will use it consistently.
Verify the plan against the live network
Documentation is only valuable when it matches reality. After entering the first subnet, compare it with the router or firewall and verify the gateway, DHCP range, VLAN, and active leases. Check a few important devices from both directions: resolve the hostname to the expected address, then confirm that the address points back to the expected device.
Look specifically for these failure modes:
- Two devices claiming the same address
- An address outside the subnet recorded for it
- A gateway that is not reachable from the segment
- A DHCP scope that overlaps a static range
- A reservation recorded in Obelinf but missing from the router
- An old address still documented after a device was replaced
The VLAN and Subnet Management workflow is useful when you are separating a flat homelab into management, server, IoT, and guest networks. Build the address records and the VLAN relationships before changing firewall rules, so the intended design is documented before traffic depends on it.
Keep your homelab IPAM current
The best update time is immediately after a network change. When you add a service, create its address record before you deploy it. When you retire a device, remove the assignment or update the record rather than leaving a stale hostname behind. When you create a new VLAN, add the subnet, gateway, and purpose together.
Once a month, compare the IPAM records with the router leases and the device inventory. Search for addresses without a hostname, devices without an address, and subnets whose utilization looks different from the live network. Obelinf gives you a single place to search those records and see whether an address is assigned, reserved, or available.
The goal is not to document every temporary address forever. The goal is to make important addresses easy to find, make available space obvious, and make every permanent assignment explainable.
The practical homelab workflow
For most homelabs, the repeatable process is simple:
- Inventory the existing networks and devices.
- Name each subnet by its purpose, not only its CIDR.
- Record gateways, VLANs, DHCP ranges, and sites.
- Add important addresses with hostnames and descriptions.
- Link addresses to devices or virtual machines.
- Mark future allocations as reserved.
- Verify the records against the router and live devices.
- Update the record every time the network changes.
Obelinf fits this workflow because it keeps the subnet, address, device, and reservation context together. You can start with one existing /24 and expand the model as the homelab grows, without rebuilding the documentation every time you add a server or VLAN.
The important decision is to stop treating IP addresses as isolated numbers. Once each address has a subnet, a purpose, an owner, and a current status, troubleshooting becomes faster and future changes become safer.
If you want to document devices, racks, cables, and topology alongside your address plan, see the Obelinf homelab use case for the broader workflow.
Frequently Asked Questions
How do I manage IP addresses in a homelab?
Should homelab devices use static IPs or DHCP reservations?
What subnet layout works well for a homelab?
Can Obelinf manage my DHCP server?
Is IPAM useful for a small homelab?
Stop reaching for a spreadsheet
Obelinf keeps every subnet, device, circuit, and rack in one live source of truth, with audit logs and a topology view. Free for personal use.
Related Articles
Kubernetes CIDR Planning: A Practical Guide
Plan Kubernetes Pod, Service, Node, and Load Balancer networks with practical CIDR sizing, overlap checks, growth assumptions, and a worked example.
Read more
Multi Cloud CIDR Planning: Avoid VPC and VNet Overlaps
Plan private CIDR space across AWS VPCs, Azure VNets, and Google Cloud VPCs without creating overlaps that break peering, VPNs, or future hybrid connectivity.
Read more
Tracking IPs, VLANs, and Devices Before They Multiply
Set up the habit of tracking IPs, VLANs, and devices while your network is still small, before retroactive documentation and the first IP conflict catch up with you.
Read more